Apache HTTP Server Setup: A Guide to Key Configurations
In the previous post, we saw how to install and setup Apache web server. In this article we’ll see how to configure a basic web application, enable SSL/TLS and few more basic configuration in regards to security enhancements.
Introduction:
Same as other Linux applications, the Apache web server configuration files are present inside /etc.
To view all the files or directories inside Apache, navigate to /etc/apache2 (Debian/Ubuntu etc) or /etc/httpd ( Red Hat, Rocky Linux, Alma etc) and ls.
.rw-r--r-- root root 7.1 KB Mon Jan 23 23:55:54 2023 apache2.conf
drwxr-xr-x root root 4.0 KB Sat Mar 11 22:30:00 2023 conf-available
drwxr-xr-x root root 4.0 KB Fri Feb 10 12:17:51 2023 conf-enabled
.rw-r--r-- root root 1.7 KB Fri Jul 22 01:08:00 2022 envvars
.rw-r--r-- root root 30 KB Fri Jul 22 01:08:00 2022 magic
drwxr-xr-x root root 12 KB Sat Mar 11 22:30:01 2023 mods-available
drwxr-xr-x root root 4.0 KB Thu Feb 9 11:42:26 2023 mods-enabled
.rw-r--r-- root root 320 B Fri Jul 22 01:08:00 2022 ports.conf
drwxr-xr-x root root 4.0 KB Sat Mar 11 22:30:01 2023 sites-available
drwxr-xr-x root root 4.0 KB Thu Feb 9 11:42:26 2023 sites-enabled
→ apache2.conf/httpd.conf is the primary configuration file of Apache.
→ conf-available/conf-enabled : contains default configurations file like security.conf.
→ mods-available/mods-enabled : contains different module to extend the functionalities of apache.
→ sites-available/sites-enabled: contains our custom host configuration.
Note: Any configuration inside the dir *-available will not work until we create a symlink to enable those configurations. *-available — Contains configuration *-enabled — Contains configuration which are enabled.
In rhe following section, we’ll see how to use these for our web application.
Hosting our web application:
Create a directory with the project name inside /var/www/ or any location.
cd /var/www
sudo mkdir DemoApp
Now a create an index page either index.html or index.php under DemoApp and paste your custom html which will be shown on the web page
cd DemoApp
vim index.html
<html>
  <head>
    <title> Your page title </title>
  </head>
  <body>
    <p> Contatulations! Web Server and Host configuration is successful </p>
  </body>
</html>
Now that we have our application ready, we need to configure Apache to serve the web page.
Creating Virtual Host:
Create a new file inside /etc/apache2/sites-available/. The file name should end with .conf extension.
cd /etc/apache2/sites-available/
sudo vim abc.conf
The contents inside the .conf follows a specific pattern as below.
<VirtualHost *:80>
        ServerName <url> #example.com
        ServerAlias <www.url> # www.example.com
        DocumentRoot /var/www/path_to_the_app/ # this is where it will pickup the index from
        <Directory /var/www/path_to_the_app/>
                Options -Indexes +FollowSymLinks
                AllowOverride All
                Require all granted
        </Directory>
        ErrorLog ${APACHE_LOG_DIR}/error.log
        CustomLog ${APACHE_LOG_DIR}/access.log combined
</VirtualHost>
Once the above step is complete. We need to enable the configuration by creating a symlink for this .conf inside sites-enabled directory.
Alternatively on Debian/Ubuntu machines we can use Apache specific command to let Apache create the symlink for us. For the Apache to recognise the newly configured site, we need to reload/restart the web serer.
sudo a2ensite abc.conf
sudo systemctl apache2 reload
Now lets try browsing our application.
http://localhost
http://ip
http://url.com
This will display the web page content as we have in our index.html.
Note: If you have a domain name already use that in the virtual host configuration and you should be able to see the web page when you browse the particular URL.
Enabling SSL/TLS:
If we want to have SSL/TLS enabled for your application, we’ll need ssl certificates to be included in our virtual host configuration.
The configuration should look like this:
<VirtualHost *:80>
        ServerName <url> #example.com
        ServerAlias <www.url> # www.example.com
        # Redirect permanent "/" "https://url"
        DocumentRoot /var/www/path_to_the_app/ # this is where it will pickup the index from

        <Directory /var/www/path_to_the_app/>
                Options -Indexes +FollowSymLinks
                AllowOverride All
                Require all granted
        </Directory>
        ErrorLog ${APACHE_LOG_DIR}/error.log
        CustomLog ${APACHE_LOG_DIR}/access.log combined
</VirtualHost>
<IfModule mod_ssl.c>
 <VirtualHost *:443>
                ServerName <url> #example.com
                ServerAlias <www.url> # www.example.com
                DocumentRoot /var/www/path_to_the_app/
                SSLEngine on
                SSLCertificateFile /etc/apache2/ssl/cerificate.crt
                SSLCertificateKeyFile /etc/apache2/ssl/certificate.key
         <Directory /var/www/path_to_the_app/>
                Options -Indexes +FollowSymLinks
                AllowOverride All
                Require all granted
         </Directory>
</VirtualHost>
</IffModule>
Now that we have our configuration ready, we need to enable ssl module in Apache and then reload Apache service to have the new configuration applied. Use the Redirect permanent if you want to transfer all HTTP traffic to HTTPS.
sudo a2enmod ssl
sudo systemctl apache2 reload
Note I: If you don’t see the expected result check the Apache status and Apache log under /var/log/syslog/apache2. Note II: When we modify/create any new configuration, we can validate the syntax of the config file using below command.
apachectl configtest
Voila! our site is finally ready with SSL/TLS.
Hiding Server Information:
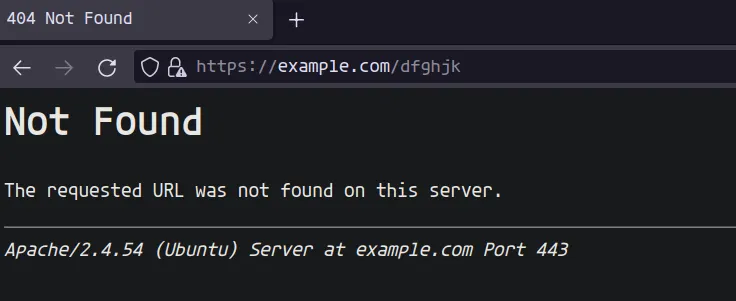
The web server exposes a few details about itself and the host machine. To verify this, try browsing a path on your application which does not exist. You should see a 404 error page along with it the page would display Apache version, the and the host OS.
To hide these details, we need to update ServerTokens and ServerSignature in ‘security.conf’ file under “/etc/apache2/conf-available/”.
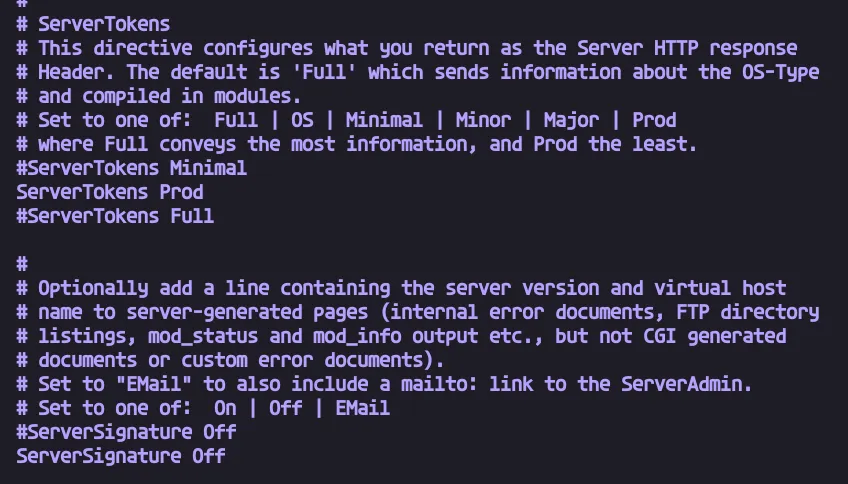
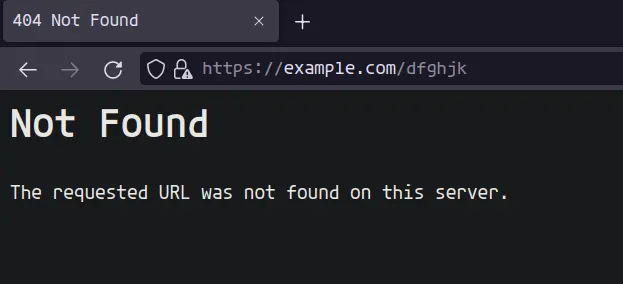
Set ServerTokens to ‘Prod’ and ServerSignature ‘Off’. Reload Apache and check the error page.
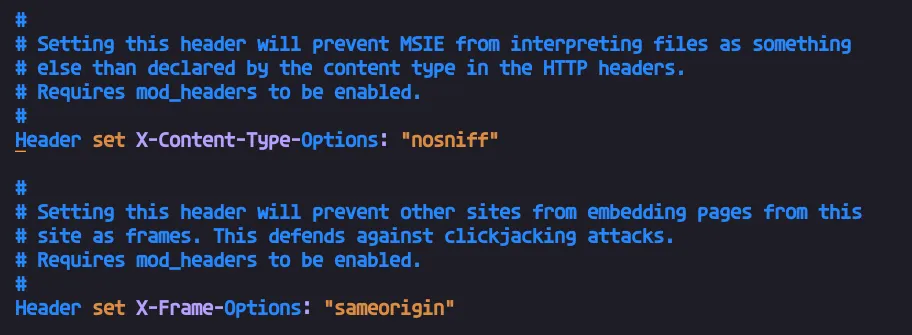
Disable MIME sniffing and CROSS Origin Requests:
To disable browser to look for content type in your application set The X-Content-Type-Options to ‘nosniff’. To disable CORS or to allow only same origin request, set the X-Frame-Options to ‘deny’ or ‘sameorigin’.
These can be set per application basis or globally using /etc/apache2/conf-available/security.conf .
We need to enable headers modules and restart apache2 to make these work.
X-Content-Type-Options: nosniff
X-Frame-Options: DENY
X-Frame-Options: SAMEORIGIN

sudo a2enmod headers
sudo systemctl restart apache2
Hide your application from Google Search:
If you want to hide your application from appearing in google search, use X-Robots-Tag header. You can set this individually for the application using .htaccess file or use the tag in virtual host configuration. To use this tag globally, add this header in apache.conf or or security.conf.
Header set X-Robots-Tag "noindex, nofollow"
That’s all for now. Reference : MDN Docs 1, 2, Google Search Central.
See more : Install Apache, LAMP Stack, Apache as Proxy Server.
SSL for Everyone: A Guide to configure Let’s Encrypt with Certbot