
What is Load Balancer
A load balancer is a tool that helps distribute incoming internet traffic across multiple servers to ensure that no single server becomes overwhelmed.
AWS provides different types of load balancers that help manage web traffic to your applications. The load balancer ensures that your application can handle more visitors without crashing, and it can also automatically route traffic to healthy servers if some servers are having problems.
There are multiple types of load balancer in AWS:
- Classic Load Balancer (CLB) — this is the first gen load balancer used of traffic across multiple EC2 instances but it’s obsolete now.
- Application Load Balancer (ALB) — its best for load balancing of HTTP and HTTPS traffic, provides advanced request routing capabilities. Operates at layer 7 of the OSI model.
- Network Load Balancer (NLB) — Operates at layer 4, generally used applications with low latency requirements.
- Gateway Load Balancer (GLB) — It enable us to deploy, scale, and manage virtual appliances, such as firewalls, intrusion detection and prevention systems, and deep packet inspection systems
In this article, we’ll use ALB for our web application with http and https.
Prerequisites
- One or more EC2 with Nginx/Apache httpd with a simple web app
- A domain in Route 53 or another provider for mapping to the ALB DNS. (Optional)
- TLS certificate, either requested via AWS or imported to ACM, if using HTTPS with the ALB (only necessary if you have a domain set up in step 2).
If you would like to know how to get a free TLS certificate, check out the below article.
The Complete DIY Guide — Let’s Encrypt SSL Setup Using Certbot
For importing certs to ACM, just copy the contents of the cert.pem and private.key to the respective fields in ACM and you are good to go.
Set up:
Alright, so setup your web server on EC2, with either Apache or Nginx and you should have a webpage or even the default webpage will suffice.
In the security group attached to these machines, allow ssh and http. Optionally just use one sg for these machines.
Make a distinguishable change to the webpage so that we can see the load balancing on the browser or just install Apache in one and Nginx in the other.

Load Balancer Setup
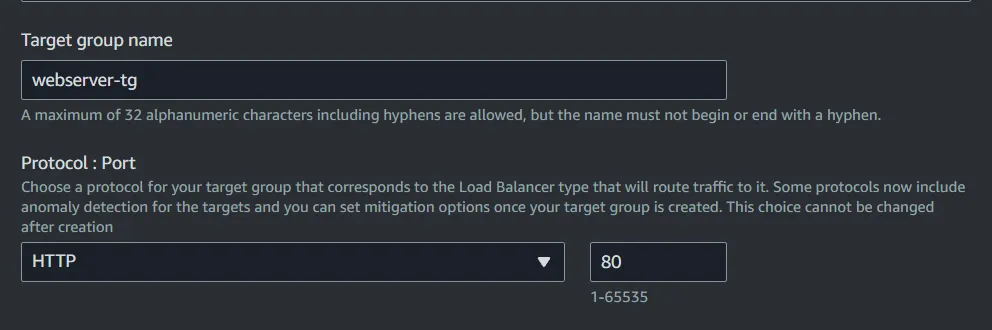
First create a target group from the EC2 menu. Choose EC2 as the target. Provide a name and keep the port as 80 as our web app is running on http.
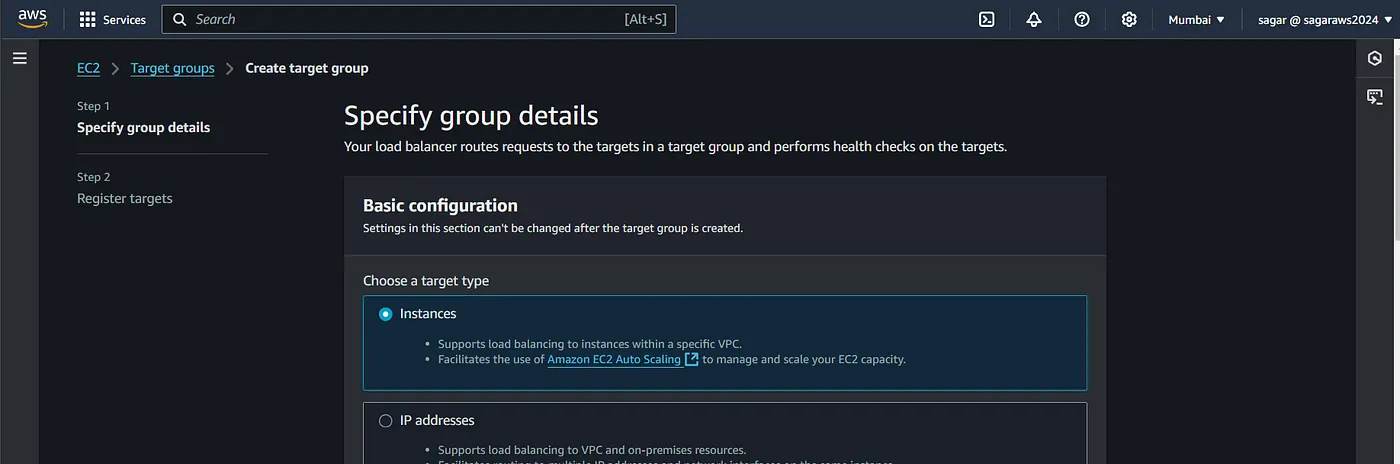
Choose IPv4, choose a vpc. Keep the health check as is, again because our app is running on port 80.
The load balancer just queries this path for determining if the machine is capable of serving traffic.

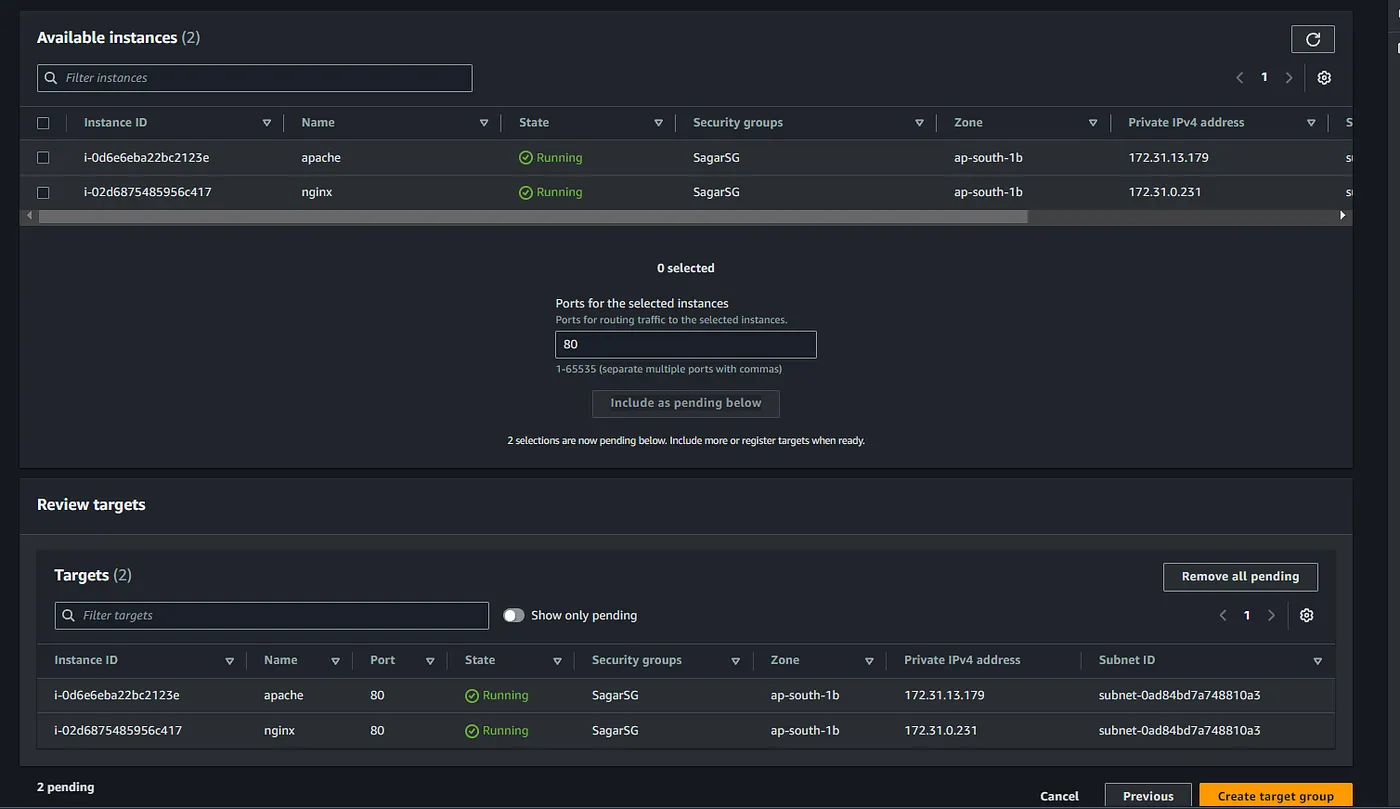
On the second step, choose the two instances you have created as targets and keep 80 port as it is then click on Add as pending.
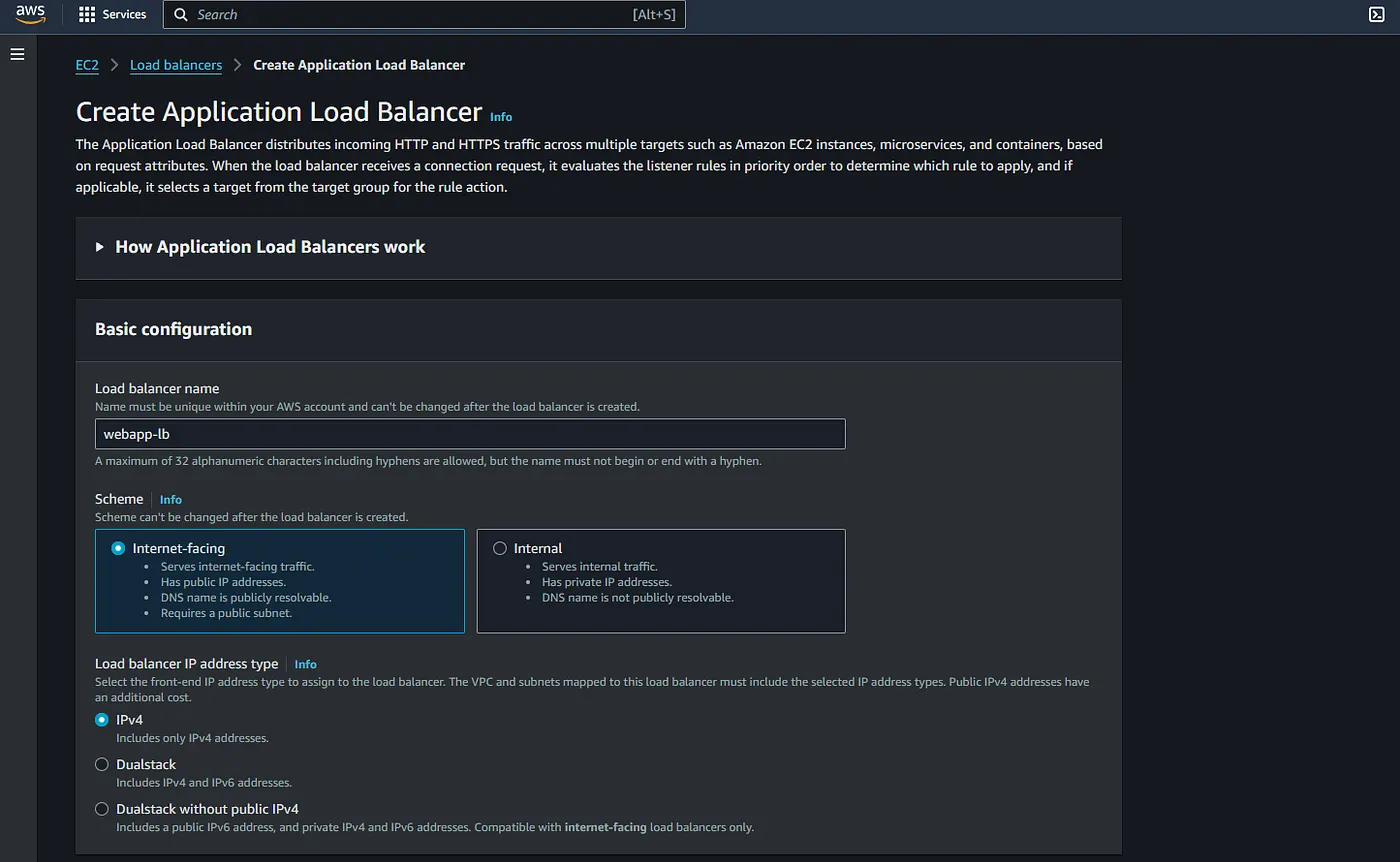
Access the Load Balancer menu from the side panel of the EC2, and click on create Load Balancer, select Application Load Balancer from the options.
Choose as internet facing, Select a vpc and select at least 2 subnets. Now select a security group/create one with only HTTP and HTTPS inbound rules.
On the Listener and routing, use http (80), select action as forward to target group and select the group created earlier. Similarly add HTTPS as well.
The rule for 80 will be changed later. If you don’t have a domain name and not planning to use TLS then skip the HTTPS listener.
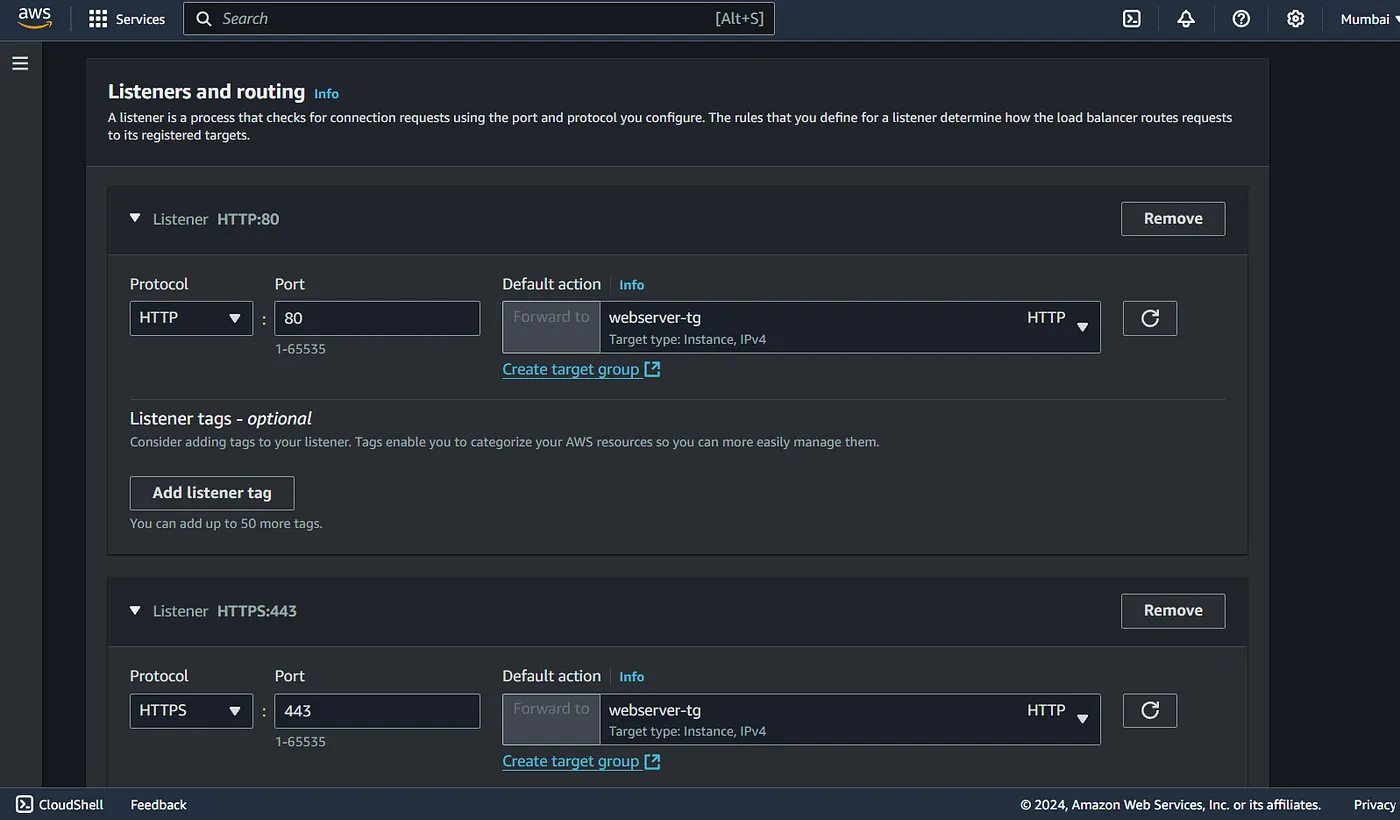
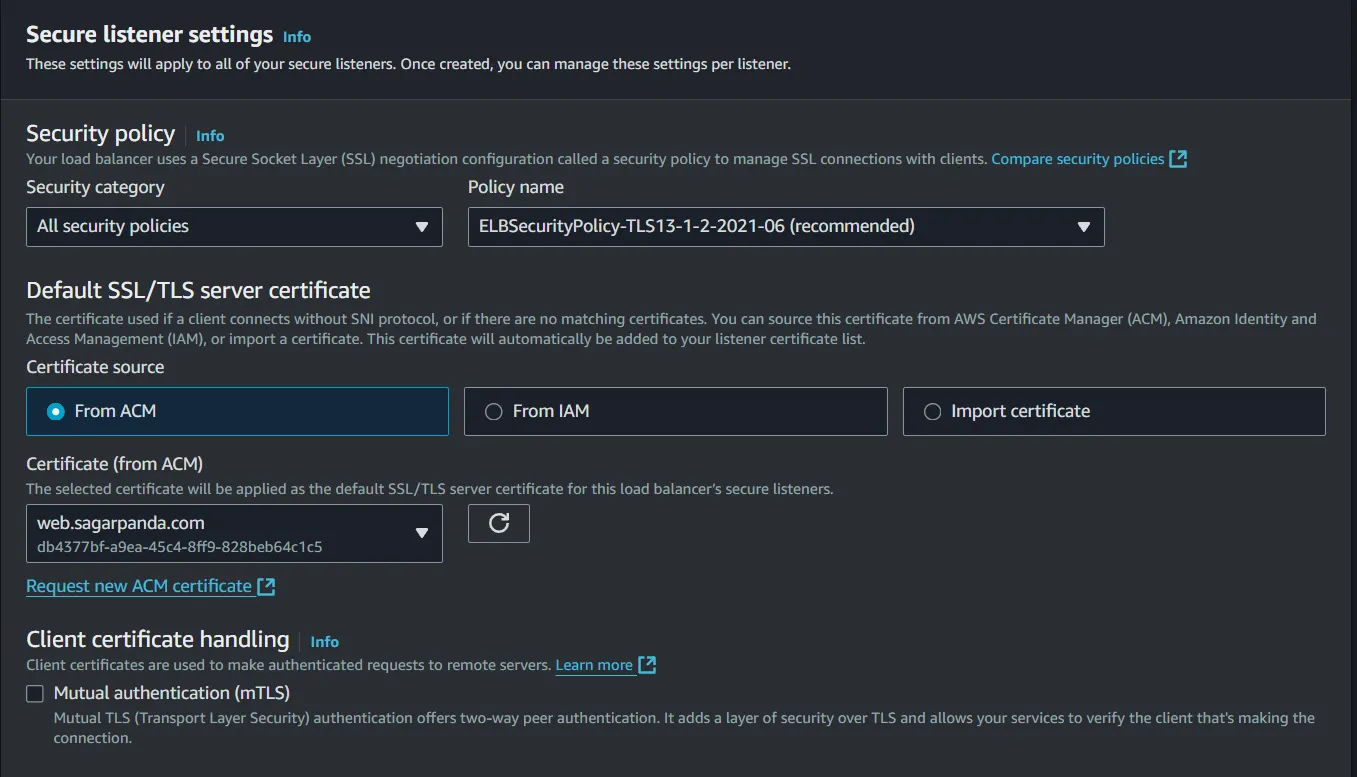
Adding the HTTPS listener, will show another section to include TLS certificates.
I have them imported to ACM, so I just select that. And create the LB. Additionally you can integrate CloudFront or WAF.
The ALB might take a couple of mins to be available. Once its active, copy the DNS name and browse it.

Great it works. The current load balancing algorithm is round robin (default) so each time traffic is distributed to one at a time.
Alright, now since alb works, lets have tls for it. Create a CNAME/Alias record for the alb dns name.
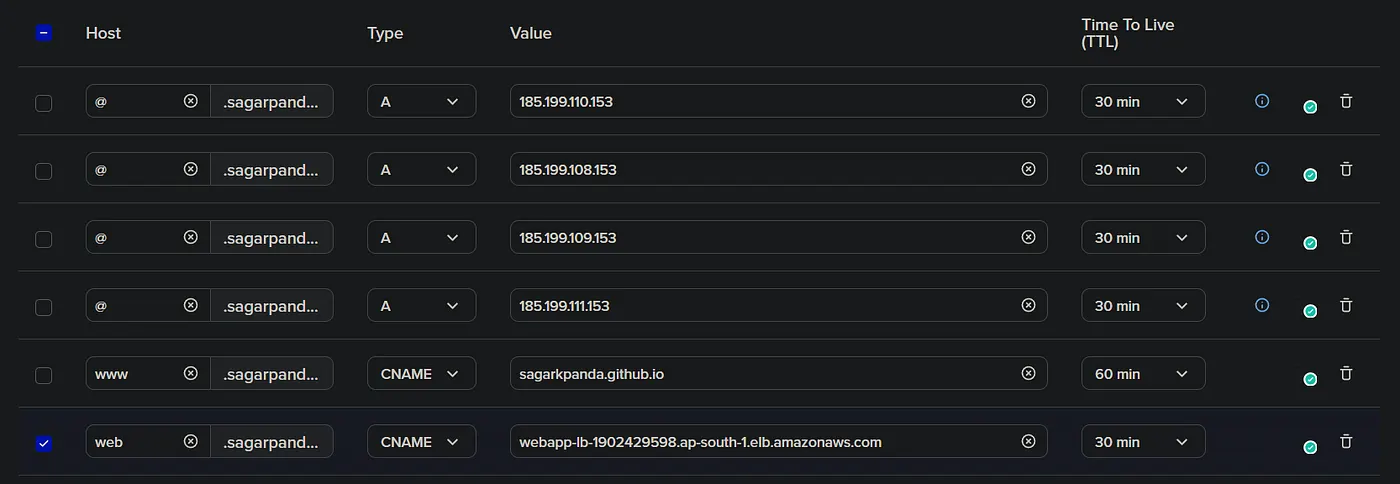
And there we go, https on the custom domain works as well.
At this point, we have two rules for 80 and 443. Browsing the domain without ssl also works, we want to make the non https traffic to automatically redirect to https.
We need to change the rule 80 on the listeners. To do so, go to the listener and rules tab on ALB, select HTTP:80 and edit rules. Now select the default rule and again click on edit rules.
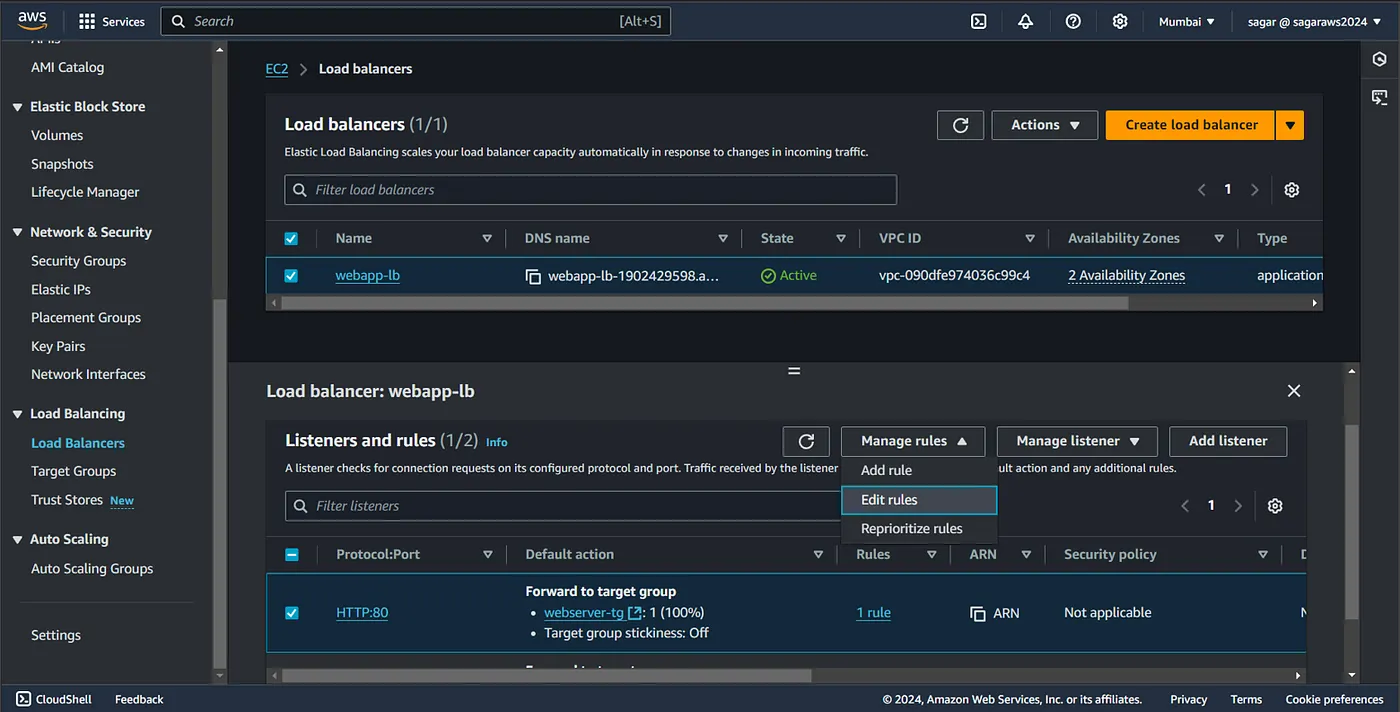
For the action in HTTP rule, instead of pointing to the target group, select redirect to URL and and 443 on the port.
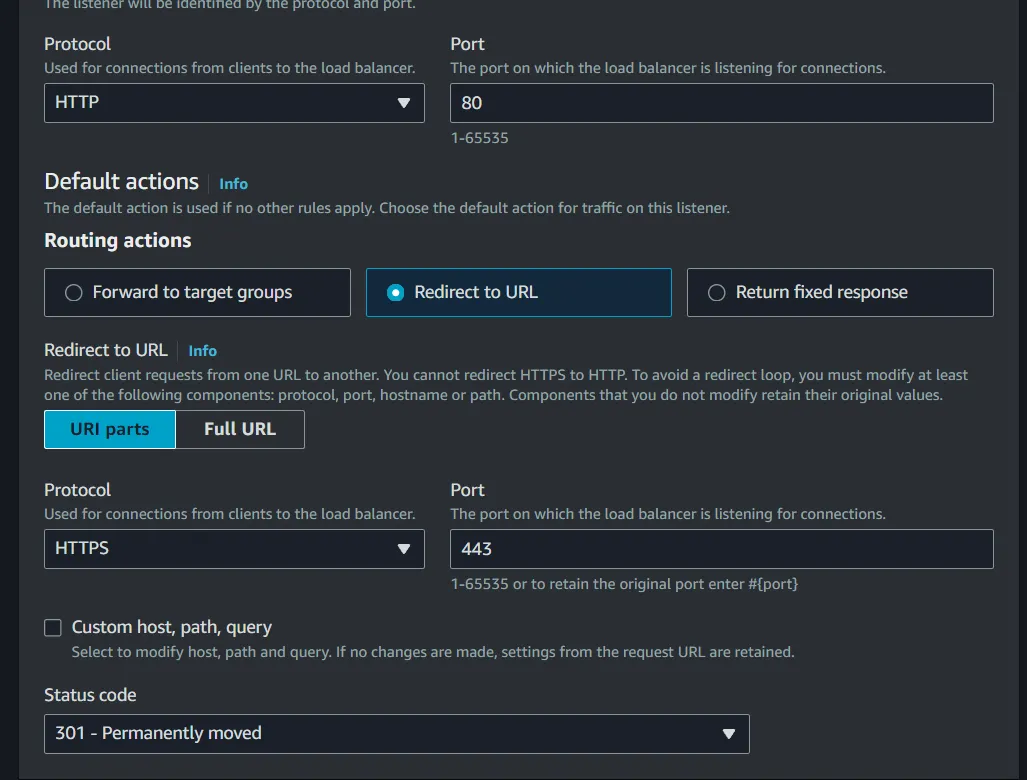
You can also do path/query based routing by checking the “custom host, path, query button”.
Load Balancing algorithms
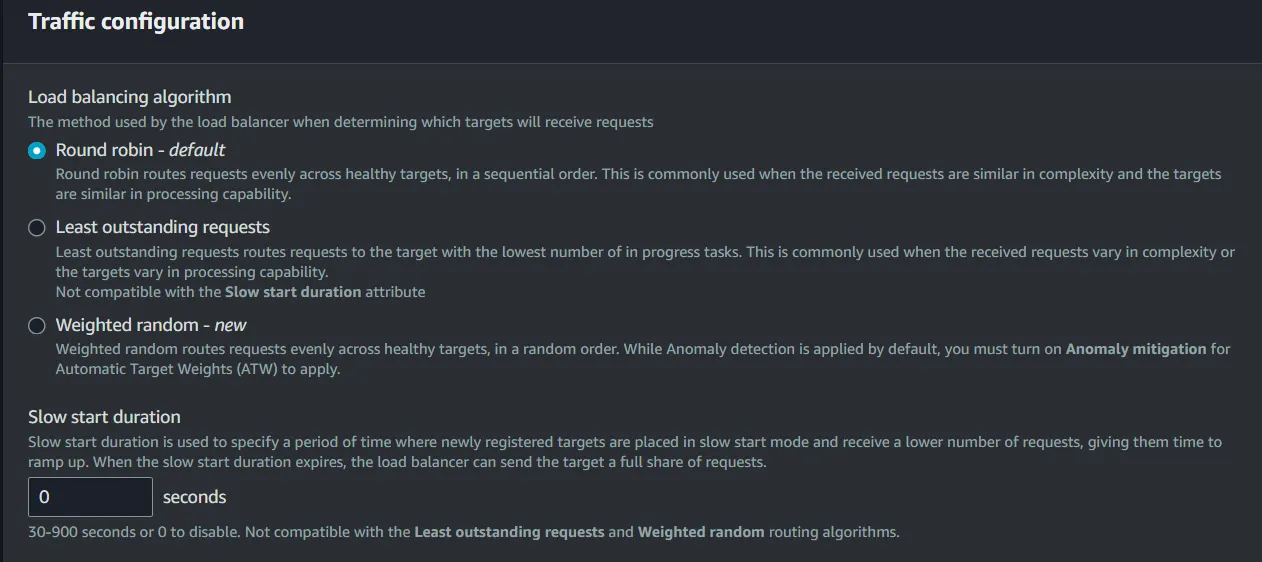
If you want to change the algorithm, select the target group, and click on change target group attributes from the action menu.
Apart of that, we have the option to change:
- Drain time — for deregistration of targets allowing graceful target termination.
- Slow start duration — Allows newly registered targets to receive traffic gradually.
- Stickiness — allows a load balancer to send all requests from a single client to the same target in a target group for the duration of the client’s session.
Additional fine-tuning
Since we are browsing the web app via Load balancer, we can disable browsing them directly.
To achieve this, we need to change the inbound rules of sg of the ec2 instances. Or create a new security group which allows HTTP and HTTPS traffic only from the sg that’s attached to the ALB. So traffic flow from custom domain → ALB DNS→ ALB sg → EC2 sg.

Wrap up
That’s the end of this setup. Explore further on mTLS and with other integrations like CDN and WAF.
After you are done, delete all the resources to avoid incurring charges.
Reference: AWS Docs
Read More on AWS: WAF, Secrets Manager, Lambda