Beginner’s Guide to setup AWS WAF with Load Balancer
Setup:
First we need to have the web app ready. You can have multiple instances of your app as we are going to use ALB.
Create your instance and host your web app.
Read more about how to set up your web app:
Install Apache , Configure Apache
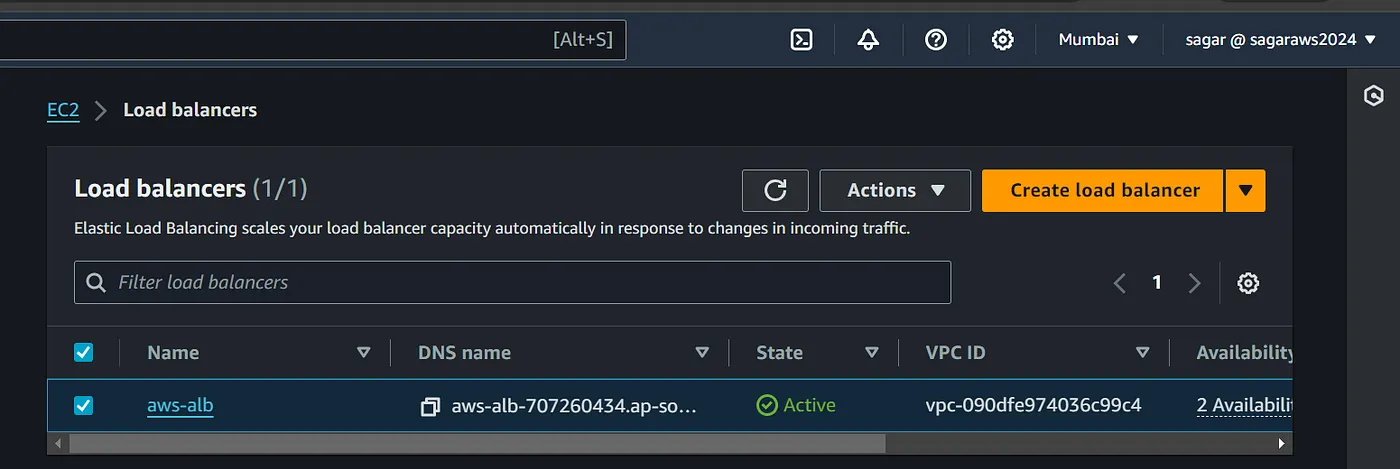
Now Create a target group pointing to your instance(s), and then create an Application LB pointing the target group.
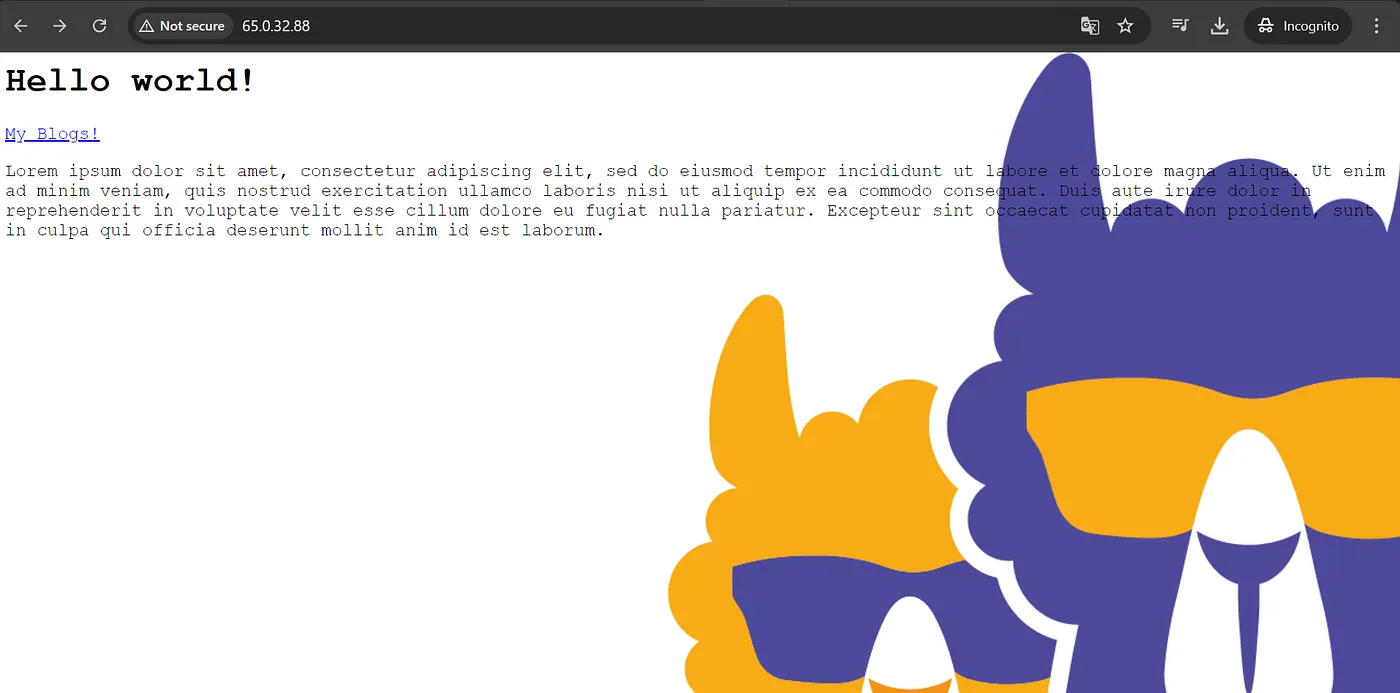
Try browsing the dns name of ALB and we should see our webpage. Note: You can remove all the rules (80, 443) from ec2 security group and add the LB as the inbound rule to prevent the app being accessible with ip browsing.
Alright then, now we can apply WAF to the load balancer. Choose regional as the other option is from CloudFront.
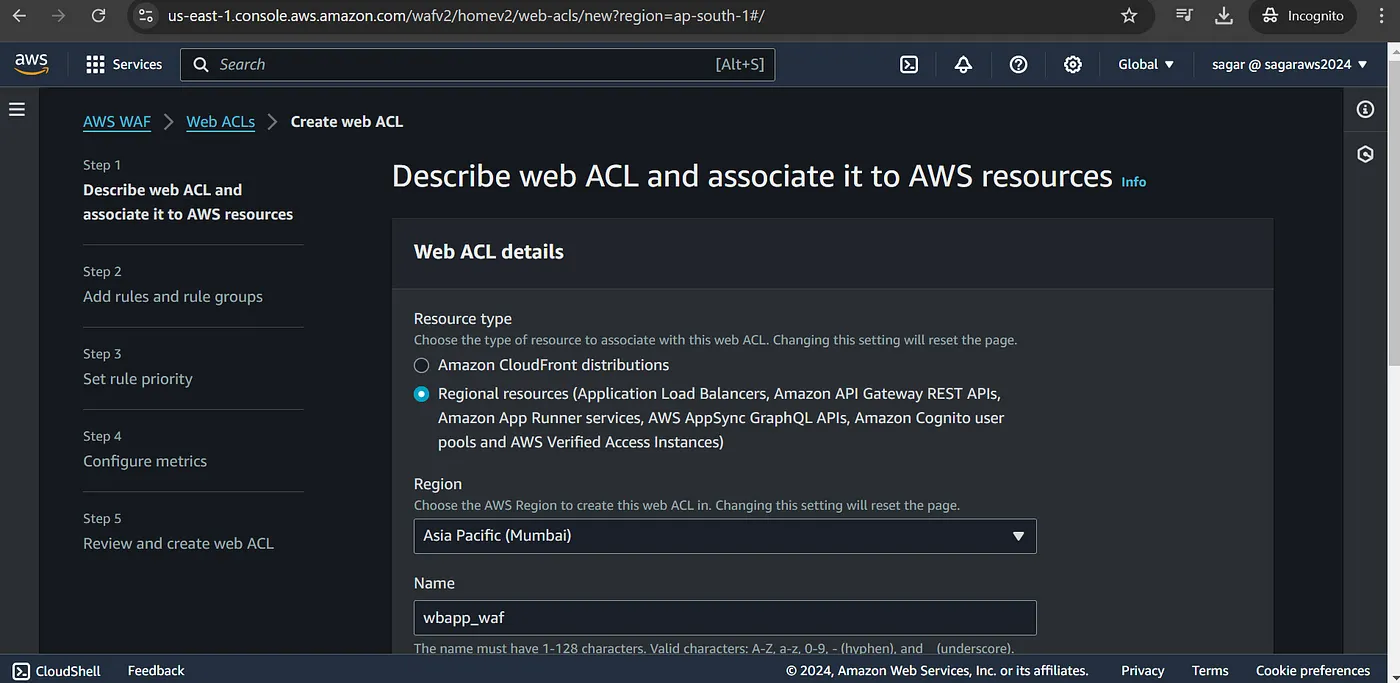
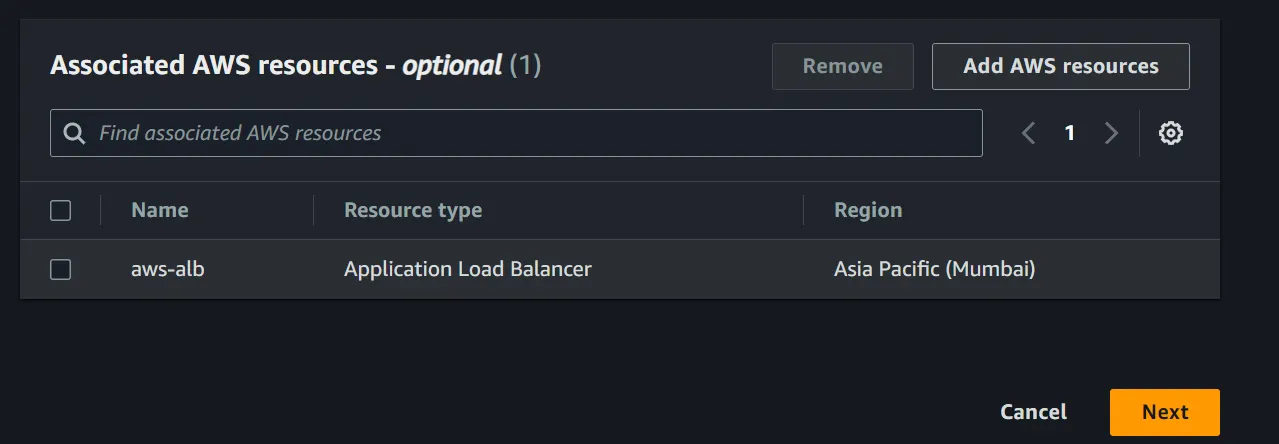
Enter a name for the waf, click on “Add aws resources” to select the aws loadbalancer created earlier.
For adding rules, we can opt for various preset or create our own. In this example I m going to use set of IPs.
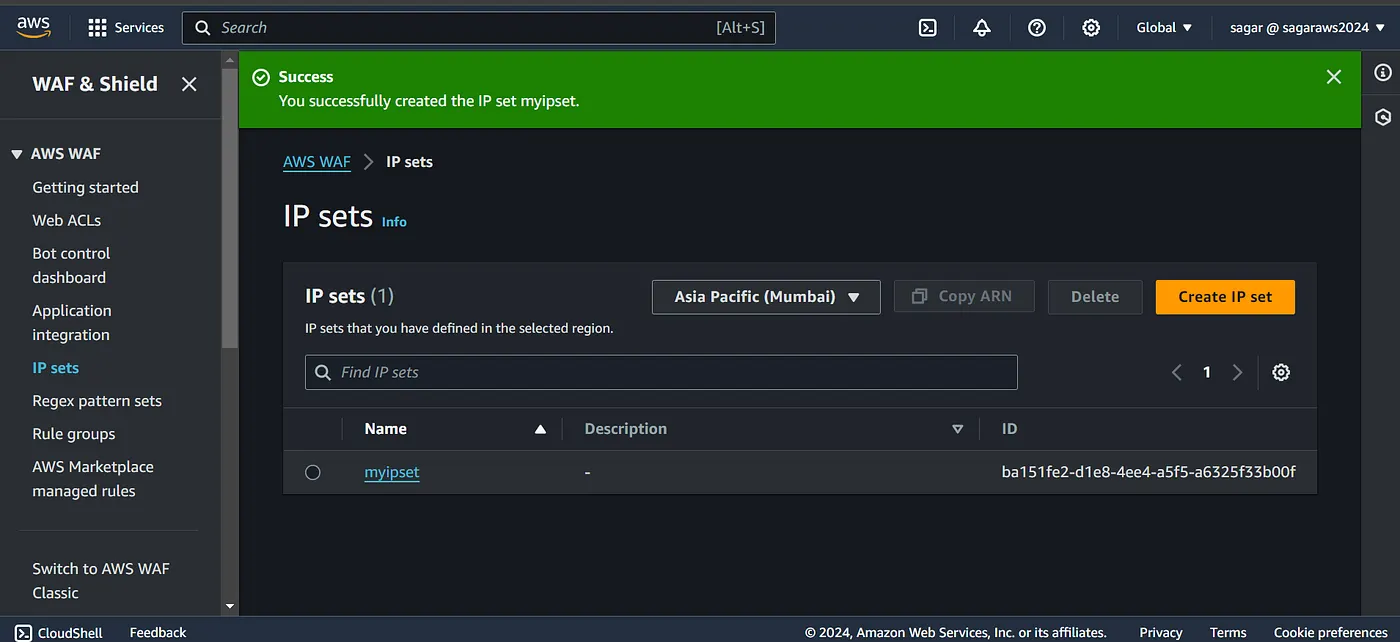
Create an Ip set, and add the list of IPS. You will need to add the IPs in CIDR format, eg 1.2.3.4/32. Add multiple if you wish to.
Back on the waf creation page, select add my own rules, select your preferred type. I have chosen IP set. Select the IP set created earlier and the action to be taken.

Then proceed and select the action for other conditions and create. In this example, I have used my own IP, and the action to be blocked, so if I try to access the app, I should get a 403 response.

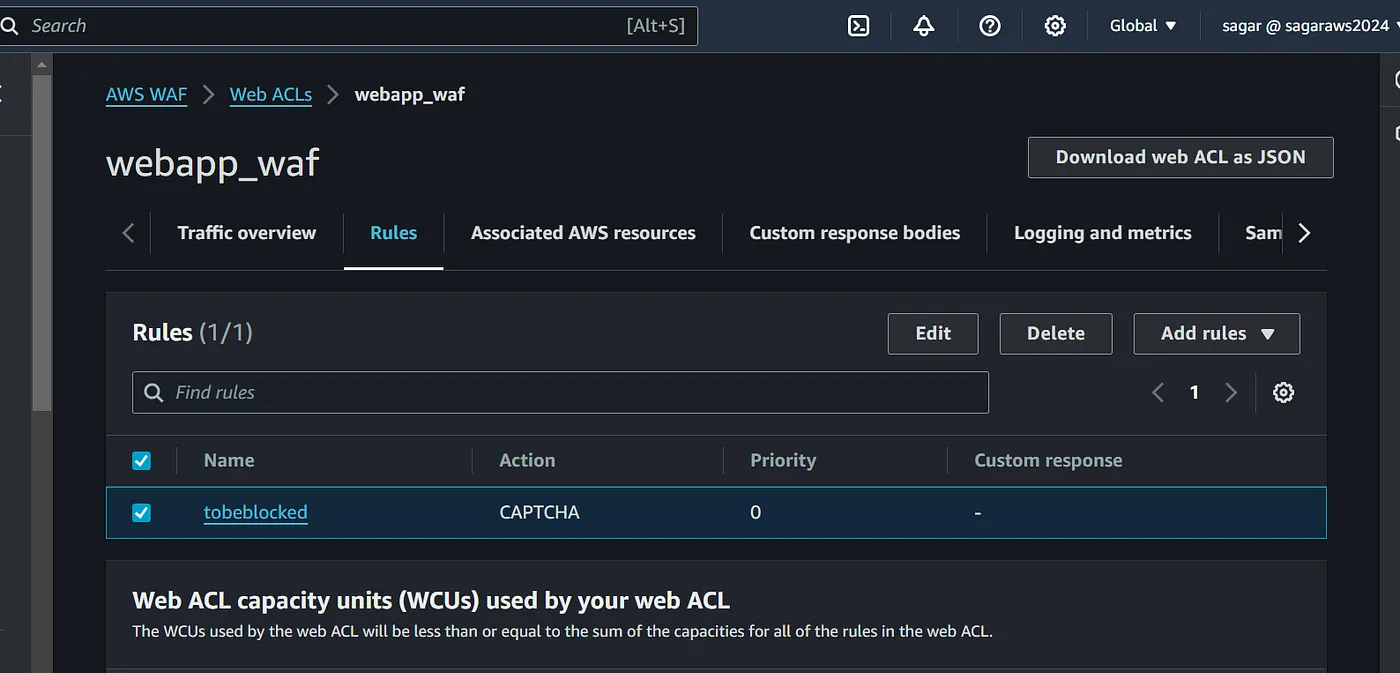
Lets update the action to have a captcha when the IP matches. Click on rules tab and edit the rules to select captcha.
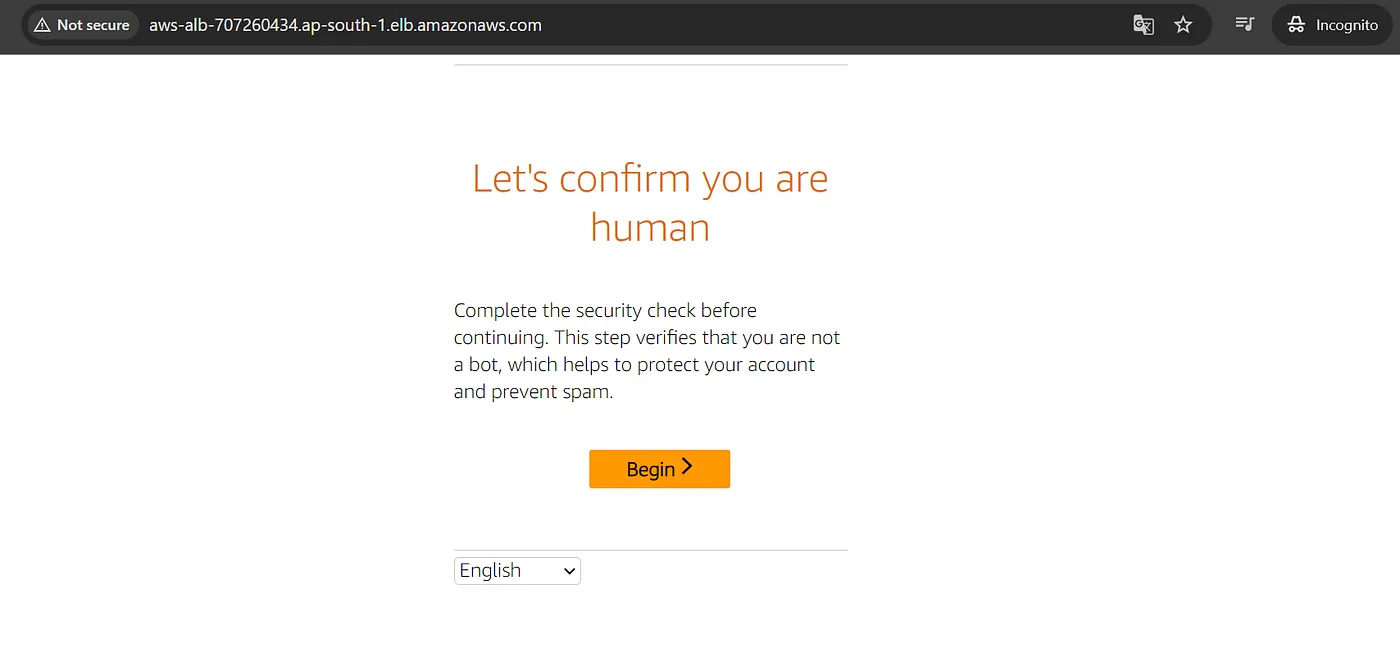
Refresh the webpage again, and we shall see captcha page.
Cool. Now experiment further to find out more on what WAF has to offer. Delete the resources once you are done with the experiment.
Read more on aws: