A Beginner’s guide to Helm in Kubernetes.
What is Helm:
Helm, the package manager for k8s similar to package manager for linux such as apt (Debian/Ubuntu based) yum/dnf (Red Hat or Fedora family of linux) , which helps us with packaging and deploying application.
Deploying an application with multiple manifests is overwhelmingly time consuming to write the yml manifests and is also error prone.
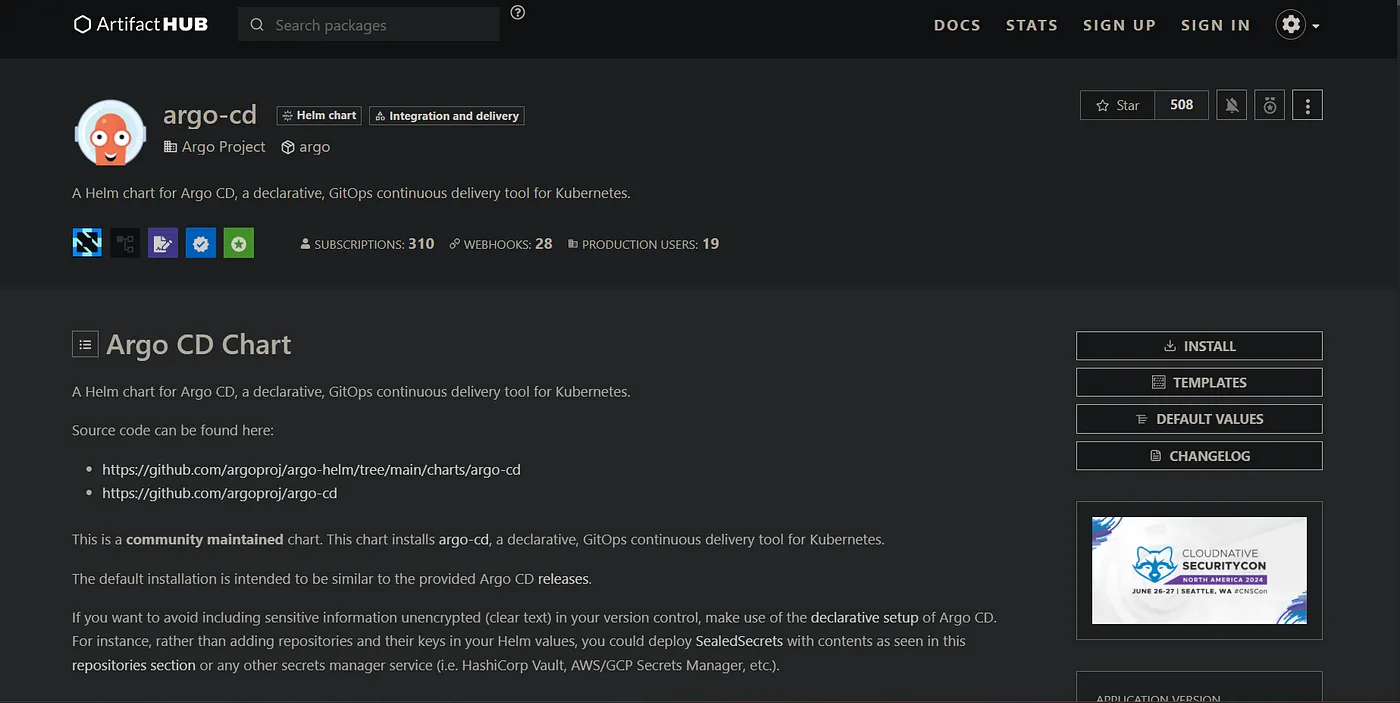
So instead of reinventing the wheel, we can reuse some common application which are already written and made available for example Prometheus, Grafana, Argo CD and etc.
Many such popular applications are already packaged and hosted in repositories such as Artifact Hub.
You can find also find official charts for these apps. You can serch for apps thru the CLI or via the web UI.

I prefer searching on the web UI.
Installation:
Follow the official doc for installation on various platforms.
I’m using the azure cloud shell, where it’s pre installed.
Note: Helm v2 and v3 have different architecture. While v2 used client server arch, v3 has just the client (the CLI).
The server component of v2 is called Tiller.
Terminologies:
Chart: A bundle of yaml configs same as Deployment or service etc which are necessary for the application setup. A chart also contains template structure so we can provide our own values while applying the chart.
Basically a package in helm is called a Chart.
Release: A running instance of a helm chart as an application is called a helm release. Using release is how we can manage the deployment, rollback etc.
Using helm:
Lets install Prometheus, which has many components such as deployments, daemon set, replicaset etc.
Get the official chart for Prometheus. You can also find the cmds to use.
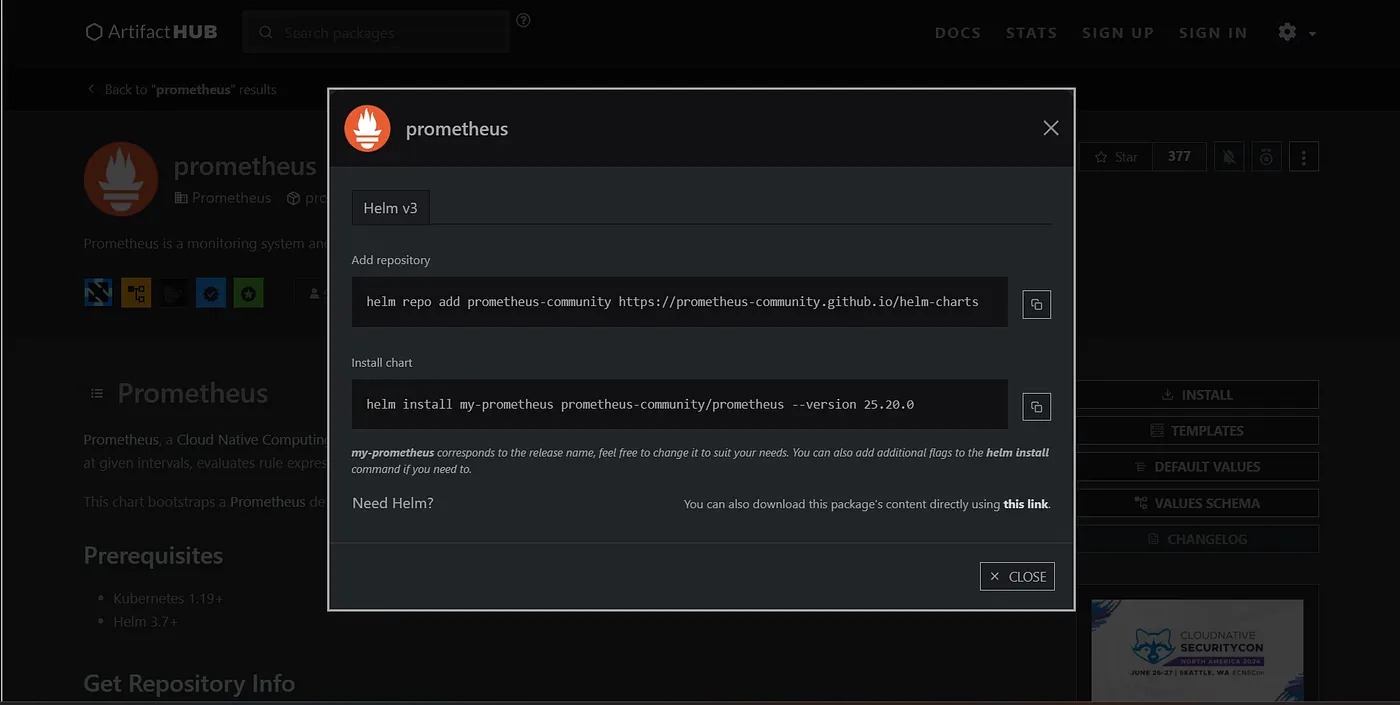
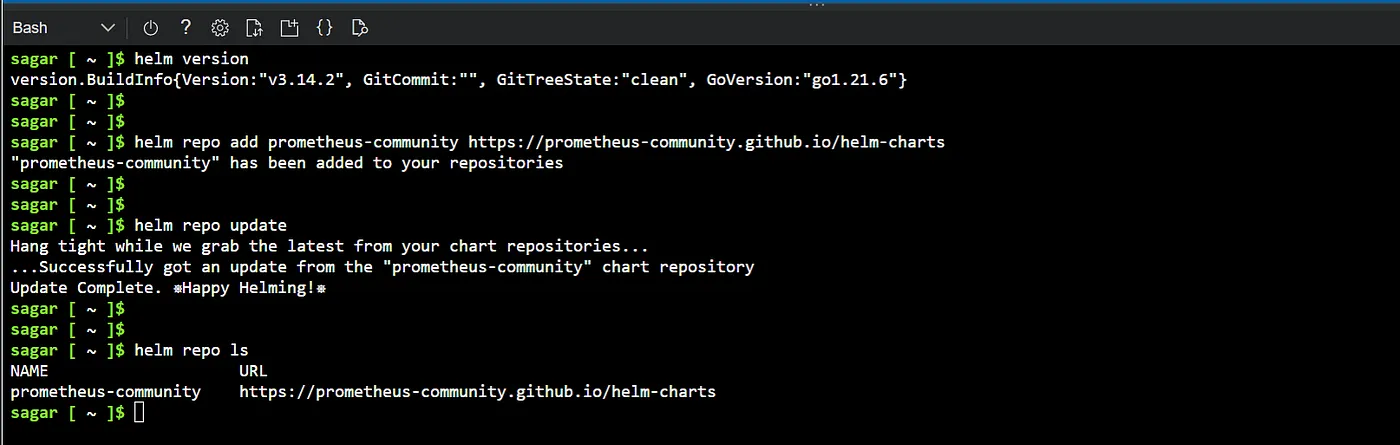
To add a repository, use helm repo add. Then update the repo.
$ helm repo add prometheus-community https://prometheus-community.github.io/helm-charts
$ helm repo update
To install a particular app use helm install.
$ helm install prom-prod prometheus-community/prometheus --version 25.20.0
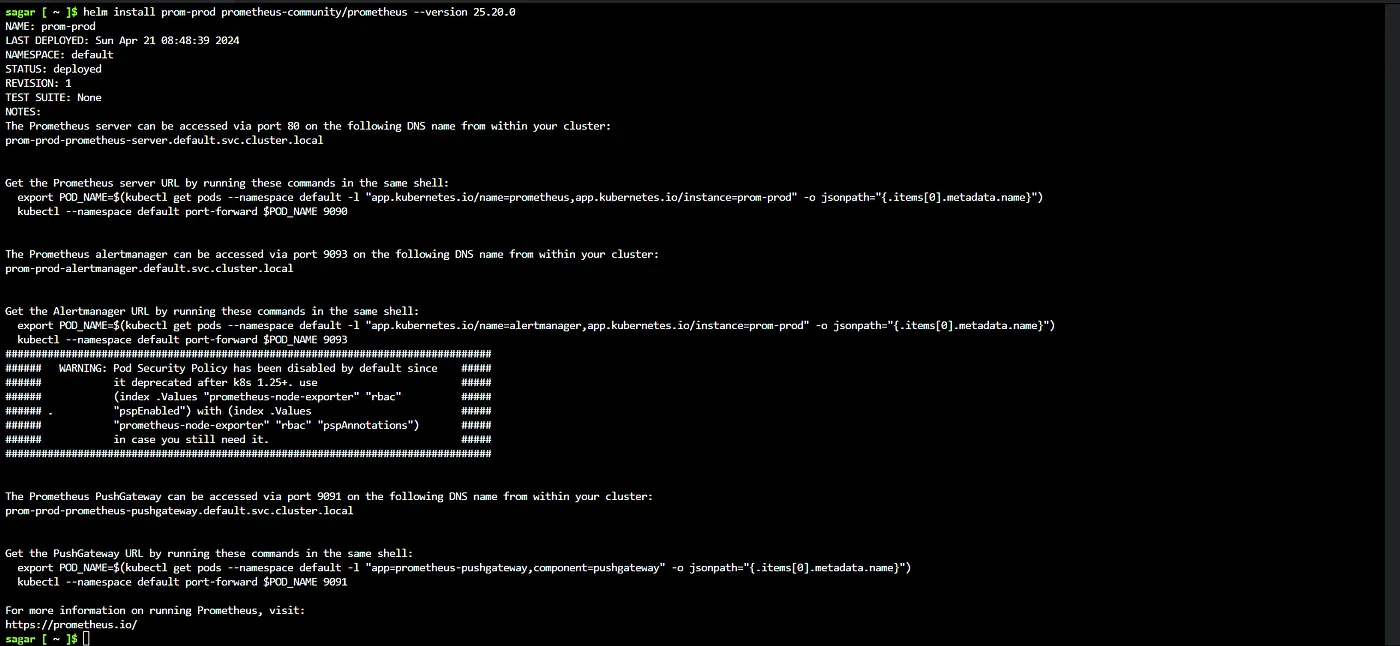
Use helm status release-name to view the above info again incase you need it later.
It also gives you the commands to use port forward, so you can access the prom UI from a web browser. But I m gonna use LoadBalnacer service for this purpose in another article.
You can list the the releases by using helm list or helm ls.
helm ls --all-namespaces

To view all the resources created from this, use the generic kubectl get cmd.
kubectl get all

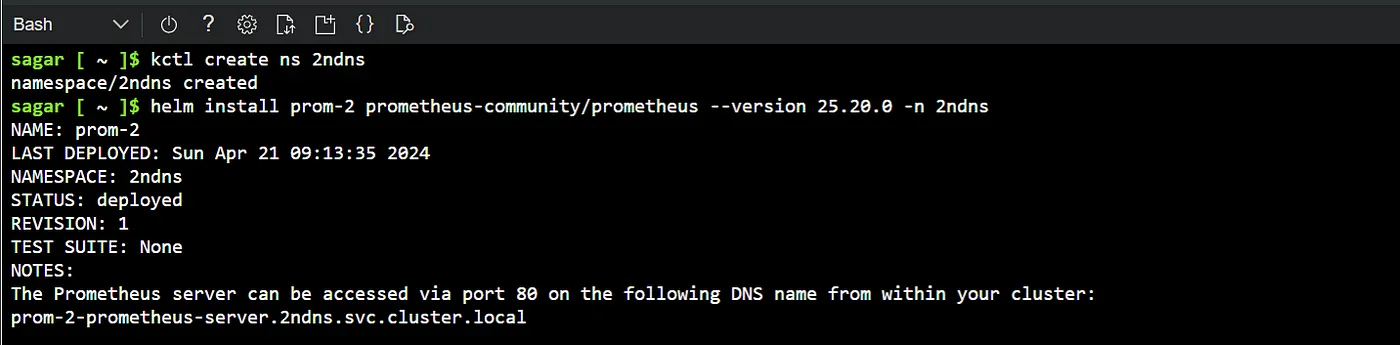
Lets install another instance of Prometheus in a different namespace.
First create a namespace. Then helm install.
$ kctl create ns 2ndns
$ helm install prom-2 prometheus-community/prometheus --version 25.20.0 -n 2ndns
And there we have it. Another prom installation.
List all the Prometheus releases. Keep an eye on the revisions and and the chart versions as we’ll experiment with them.
sagar [ ~ ]$ helm ls --all-namespaces
NAME            NAMESPACE       REVISION        UPDATED                                 STATUS          CHART                   APP VERSION
prom-2          2ndns           1               2024-04-21 09:13:35.404985363 +0000 UTC deployed        prometheus-25.20.0      v2.51.2
prom-prod       default         1               2024-04-21 08:48:39.139940706 +0000 UTC deployed        prometheus-25.20.0      v2.51.2
sagar [ ~ ]$
Operations:
The other operations apart for installation are uninstalling, updating to different versions or rollback to previous releases.
Uninstall:
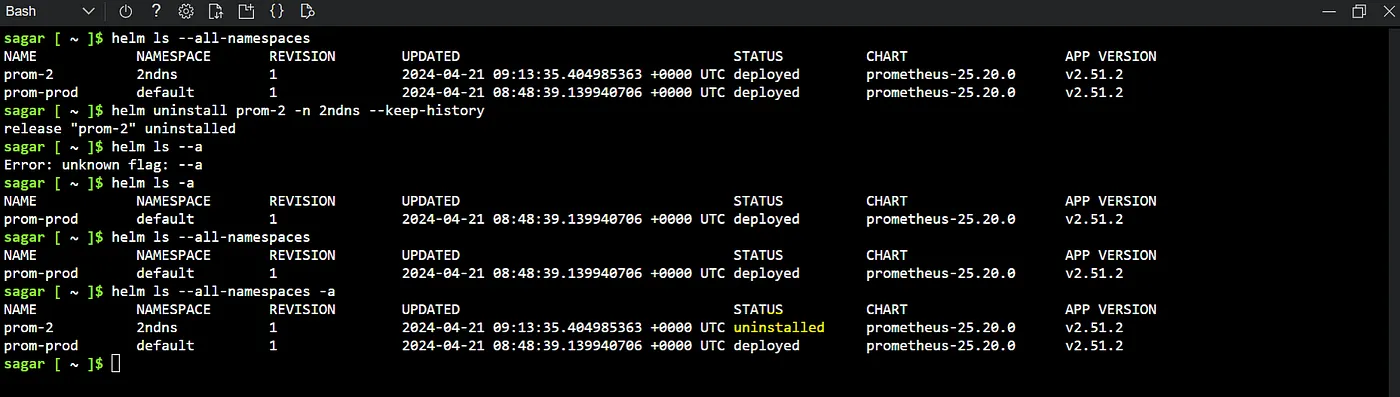
To remove a release use helm uninstall release-name. Additionally use the flag — —keep-history, so we can rollback if we want to.
helm uninstall prom-2 -n 2ndns --keep-history
Listing the releases now will now show the 2nd release which was prom-2, however we can still see its status with -a flag. The status is uninstalled as expected.
helm ls --all-namespaces
helm ls --all-namespaces -a
Update:
Consider there is a new version that I want to change. the version of prom-pord to another version.
sagar [ ~ ]$ helm upgrade prom-prod prometheus-community/prometheus --version 25.18.0
Release "prom-prod" has been upgraded. Happy Helming!
NAME: prom-prod
LAST DEPLOYED: Sun Apr 21 09:32:17 2024
NAMESPACE: default
STATUS: deployed
REVISION: 3
-------------------------------
sagar [ ~ ]$ helm ls --all-namespaces
NAME            NAMESPACE       REVISION        UPDATED                                 STATUS          CHART                   APP VERSION
prom-prod       default         3               2024-04-21 09:32:17.689890009 +0000 UTC deployed        prometheus-25.18.0      v2.51.0
Rollback:
To rollback to a particular release use helm rollback and the revision number. Specify ns if other than default.
To find out all the revisions, use helm history release name.
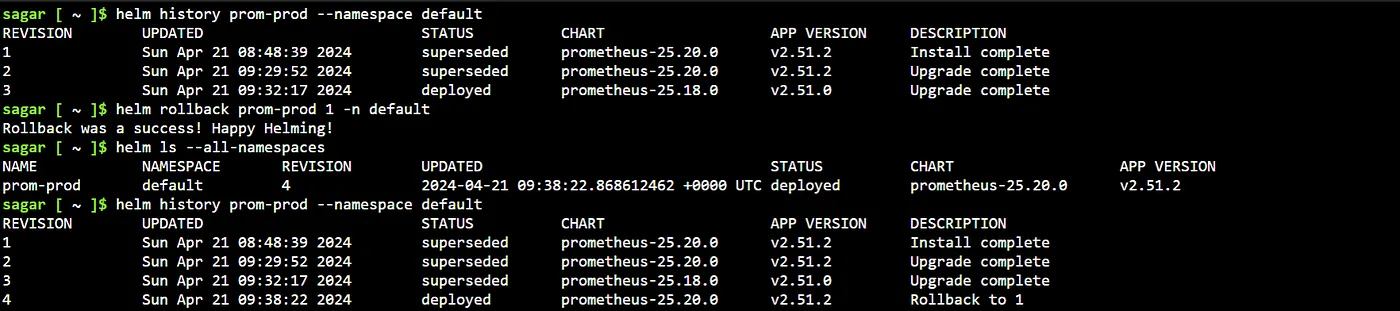
We can also bring back the prom instance that was uninstalled.
sagar [ ~ ]$ helm rollback prom-2 1 -n 2ndns
Rollback was a success! Happy Helming!
sagar [ ~ ]$ helm ls --all-namespaces
NAME            NAMESPACE       REVISION        UPDATED                                 STATUS          CHART                   APP VERSION
prom-2          2ndns           2               2024-04-21 09:39:38.609116581 +0000 UTC deployed        prometheus-25.20.0      v2.51.2
prom-prod       default         4               2024-04-21 09:38:22.868612462 +0000 UTC deployed        prometheus-25.20.0      v2.51.2
sagar [ ~ ]$ helm ls --all-namespaces -a
NAME            NAMESPACE       REVISION        UPDATED                                 STATUS          CHART                   APP VERSION
prom-2          2ndns           2               2024-04-21 09:39:38.609116581 +0000 UTC deployed        prometheus-25.20.0      v2.51.2
prom-prod       default         4               2024-04-21 09:38:22.868612462 +0000 UTC deployed        prometheus-25.20.0      v2.51.2
List the history of the 2nd release.

Wrap up:
And there we have it, all the basics of Helm. Hope you found it useful. Explore further more on how to create your own helm charts, the folder structure, ways to override the values to customize the templates. Happy Helming!

Read More on Kubernetes: