How to Set Up mTLS in NGINX for Robust Web Security.

What is mTLS:
mTLS, or mutual TLS, is a security protocol that ensures both the client and the server authenticate each other when they communicate over a network. It’s like a handshake where both sides check each other’s identity, making sure that both are who they say they are.
Typically, in regular TLS (like when you visit a website), only the server presents its identity (via a certificate). The client (browser for example) trusts the server based on that certificate.
With mTLS, the server also wants to make sure the client is trustworthy and the client also presents its own certificate to prove its identity.
How it works:
- Both the client and the server each have a digital certificate.
- When they communicate, they exchange certificates during the handshake process.
- Each side checks the other’s certificate to ensure it’s valid and trusted.
- If everything checks out, the connection is encrypted and secure.
This is the second article on how to set up a TLS certificate. Check out the article below to get the setup ready and proceed further.
The Complete DIY Guide — Let’s Encrypt SSL Setup Using Certbot
Set Up:
As of now we have the server certificate ready and it works fine. Now we need to generate client certificates and update nginx config.
1. Generate a Self-Signed CA Certificate
openssl req -newkey rsa:4096 -x509 -keyout ca.key -out ca.crt -days 30 -nodes -subj "/CN=Sagar"
Explanation:
**req**: Invokes the certificate request (CSR) generation utility.**-newkey rsa:4096**: Generates a new RSA private key with a size of 4096 bits.**-x509**: Indicates that a self-signed certificate (X.509 standard) is being created, instead of a CSR.**-keyout ca.key**: Saves the generated private key to the fileca.key.**-out ca.crt**: Saves the generated self-signed certificate to the fileca.crt.**-days 30**: Specifies that the certificate will be valid for 30 days.**-nodes**: Prevents encryption of the private key with a passphrase.**-subj "/CN=Sagar"**: Provides the subject name (Common Name, or CN) directly without prompting.
This command creates a self-signed CA (Certificate Authority) certificate and its private key. The CA can be used to sign other certificates.
2. Generate a Client Key and CSR
openssl req -newkey rsa:4096 -keyout client.key -out client.csr -nodes -days 30 -subj "/CN=sagar"
Explanation:
**req**: Invokes the certificate request (CSR) generation utility.**-newkey rsa:4096**: Generates a new RSA private key with a size of 4096 bits.**-keyout client.key**: Saves the generated private key to the fileclient.key.**-out client.csr**: Saves the generated Certificate Signing Request (CSR) to the fileclient.csr.**-nodes**: Prevents encryption of the private key with a passphrase.**-days 30**: Specifies the intended validity of the certificate being requested (used for CSR metadata; not enforced here).**-subj "/CN=sagar"**: Specifies the subject of the CSR with a Common Name of “sagar”.
This command creates:
- A private key for the client (
client.key). - A CSR (
client.csr) to be signed by the CA.
3. Sign the Client Certificate with the CA
openssl x509 -req -in client.csr -out client.crt -CA ca.crt -CAkey ca.key -CAcreateserial -days 30
Explanation:
**x509**: Invokes the X.509 certificate utility to create the signed certificate.**-req**: Indicates that the input is a Certificate Signing Request (CSR).**-in client.csr**: Specifies the CSR file to be signed.**-out client.crt**: Specifies the output file for the signed certificate.**-CA ca.crt**: Specifies the CA certificate to use for signing.**-CAkey ca.key**: Specifies the CA’s private key to sign the certificate.**-CAcreateserial**: Creates a new serial number file (ca.srl) to track the certificates issued by the CA.**-days 30**: Specifies that the client certificate will be valid for 30 days.
This command takes the client’s CSR, signs it with the CA’s private key (ca.key), and generates a signed client certificate (client.crt).
Nginx Config Changes:
Update the nginx config to include the client cert and restart nginx.
ssl_client_certificate /etc/nginx/ssl/ca.crt;
ssl_verify_client on;
 server {
    listen 443 ssl;
    server_name app.sagarpanda.com;
    # Use Let's Encrypt certificates for the server
    ssl_certificate <path to lets encrypt cert>
    ssl_certificate_key <path to lets encrypt cert>
    # Set up client certificate verification
    ssl_client_certificate /etc/nginx/ssl/ca.crt;
    ssl_verify_client on;
    # Optional: Restrict the client certificate verification depth
    ssl_verify_depth 2;
    # Additional security settings (optional)
    ssl_protocols TLSv1.2 TLSv1.3;
    ssl_ciphers HIGH:!aNULL:!MD5;
    location / {
        root /var/www/html/sagar;
        index index.html;
    }
}
At this point we can test the connection using curl. And this works fine.

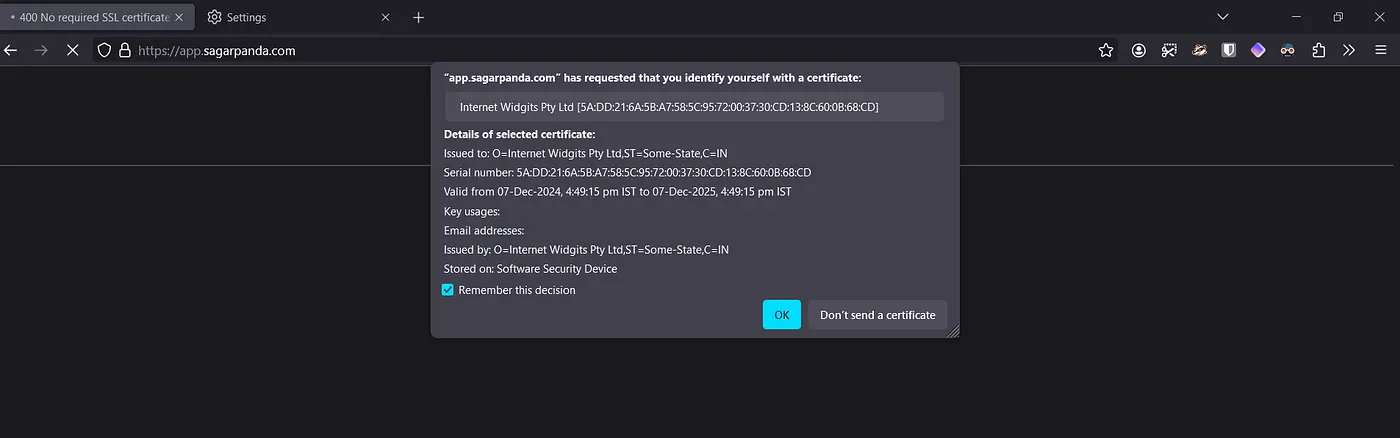
Let’s browse the app in browser and we will get error indicating we did not provide any client cert.

We need to provide the cert via browser. First convert the cleint.crt to pkcs12 format by combining both client.key and client.crt. This will ask you to enter a passphrase and creates an encrypted file.
openssl pkcs12 -export -inkey client.key -in client.crt -out client.pkcs12

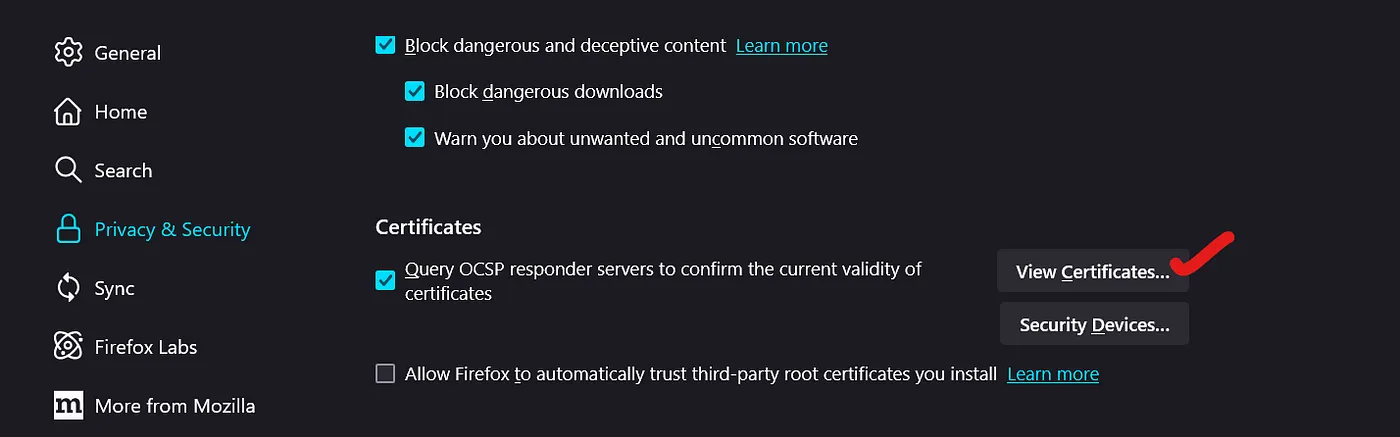
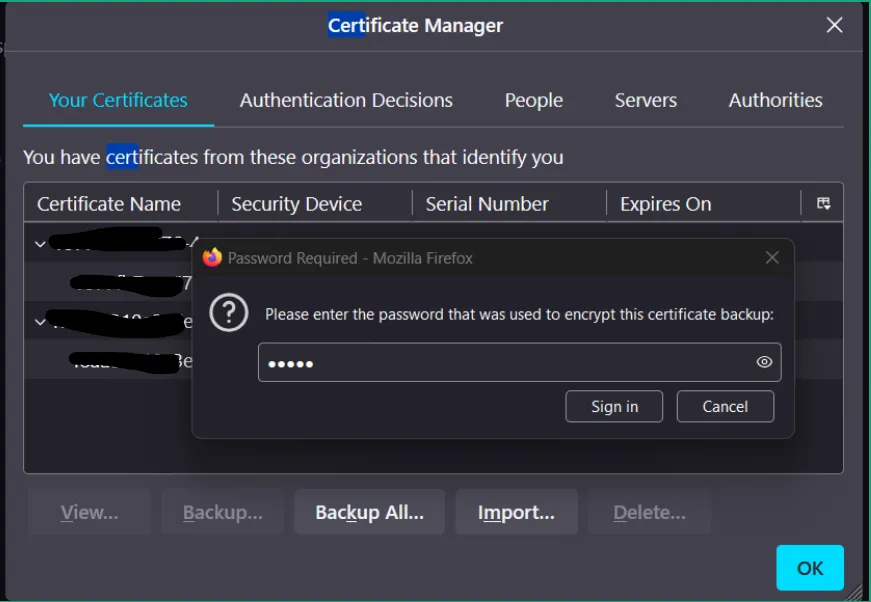
To import the certificate into the browser go to settings → privacy & security → certs → your certificates → import →select the pcks12 file and enter the passphrase.
And that’s it. Refresh the page and a pop up should appear with the cert imported earlier and the app works. Interesting right?
Conclusion:
mTLS adds another layer of security to enhance security, and authenticated communication for our application.
If you found this article helpful, click the 👏 button, it keeps me motivated to write more!
Read More on Web Servers: